The hardest part of transferring from QuickQuote countertop software to QuickBooks accounting software is making sure that your items match. QuickQuote defaults to transferring using each item’s item code, but those may not be the same as the names of your items in QuickBooks. Fortunately, QuickQuote has number of settings to help you line everything up.
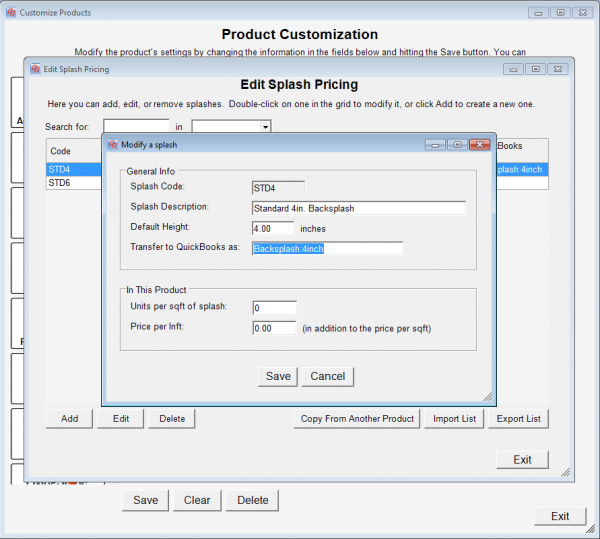
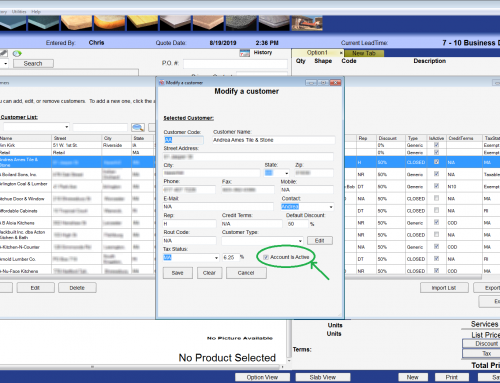
To start with, all of your items like splashes and edges have a separate field for the name of the item in QuickBooks you want to use when transferring over. You can use the same name for multiple items, so you don’t necessarily need to add a separate item in QuickBooks for everything in QuickQuote.
What you do need though is the full name of the item in QuickBooks to which you want to transfer. That means if the item in QuickBooks is a subitem of another item, you need to include that top level item name, followed by a colon, and then the name of the item itself. That is to say, if you had a top level item called “Backsplash” and two subitems of splash called “4inch” and “6inch” for different heights, to transfer to “4inch” you want to use “Backsplash:4inch” as your transfer name.

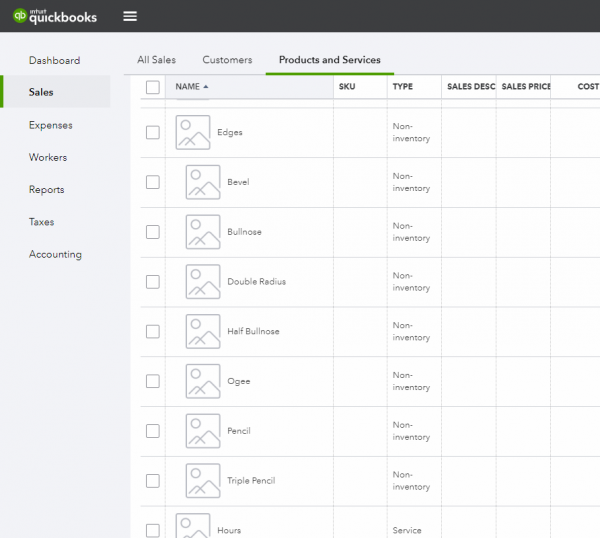
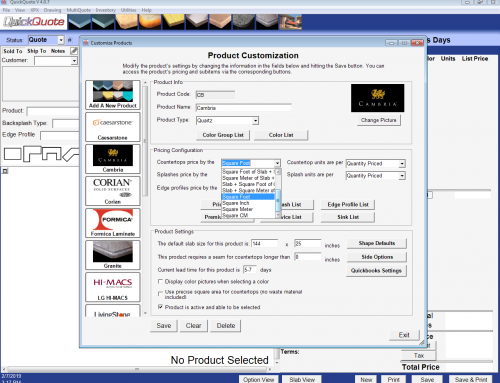
If all of your items of a given type are subitems under one header in QuickBooks, like say all edge profiles are subitems of “Edges”, you can actually set a general prefix in the QuickBooks settings for the product itself rather than putting it in for every individual item.

Each section has its own box for you to enter a prefix that will be added to all the items in that section. Don’t forget the colon!
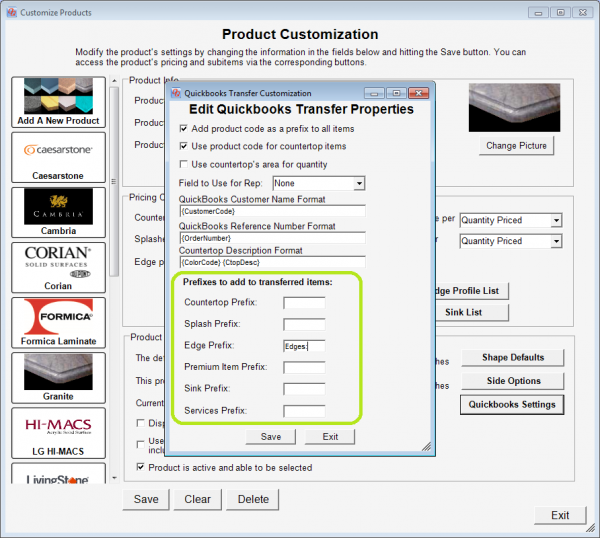
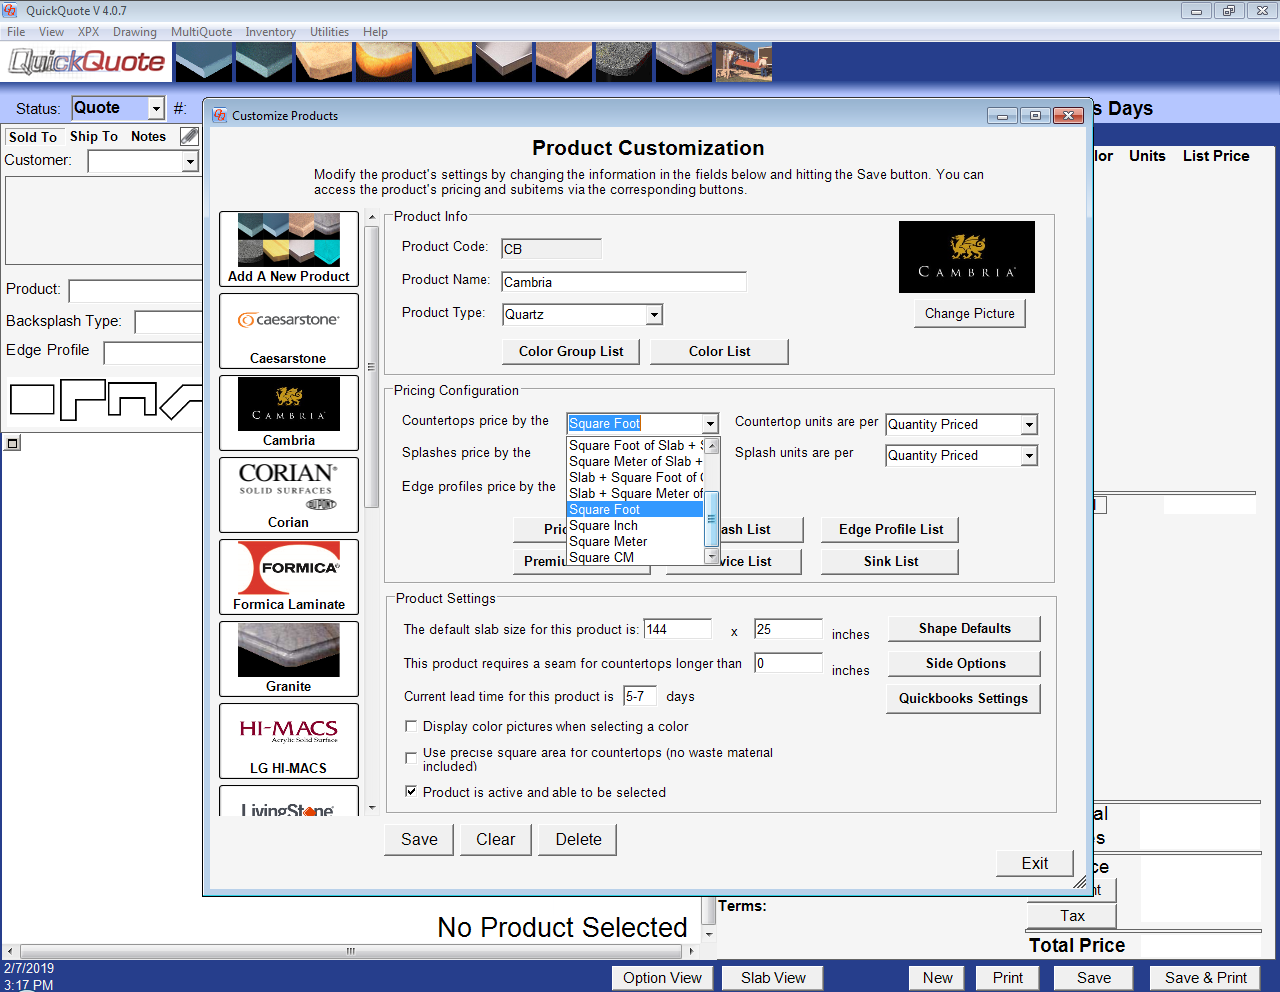
By default, all items in QuickQuote transfer as subitems of the product code. You can turn that off here as well.

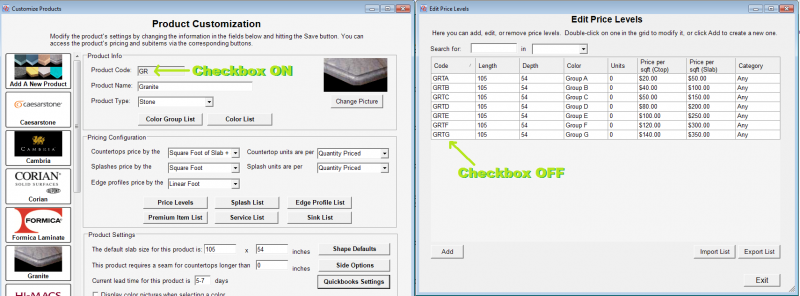
Below that is another important checkbox that says “Use product code for countertop items.” That determines what item name the countertops will transfer to QuickBooks as. By default it is checked, which means they will use the product code as their item name. So in this product, the code is “GR”, which means any countertop line items will be looking for a “GR” item in QuickBooks. If you uncheck the box, QuickQuote will use the item code you specified for the price level that the countertop falls under instead.
The rest of the fields control the format of things being transferred. If you double-click the textbox for a given format, you can add or change the fields in that format, like updating the countertop description with the color name. You can also tell QuickQuote to look up customers in QuickBooks by name instead of customer code, and set a unique format for the estimate/sales order/invoice number QuickQuote creates when transferring. That helps keep you from accidentally overwriting existing estimates/sales orders/invoices in QuickBooks by giving you the option to add a prefix or suffix like “-QQ” that will make it a unique number that’s different from QuickBooks’ usual format.
There’s even a checkbox to set which quantity to use when transferring countertops: the area of the pieces or just the number of pieces.
So hopefully that helps you get your items and quotes transferring over properly. Check back in the future for more tips & tricks to using our QuickQuote countertop estimating and drawing software!
Leave A Comment