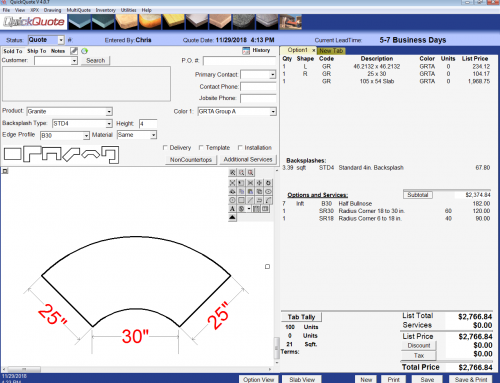
Unlike many other types of software that make you draw shapes in CAD or by hand, QuickQuote automatically creates a drawing of each countertop in your layout based on the dimensions you enter and the selections you make. By default, we keep that drawing pretty plain, but you don’t have to settle for simple spartan black and white drawings.
For more detailed and colorful layouts, you need only change a few of QuickQuote’s drawing defaults:
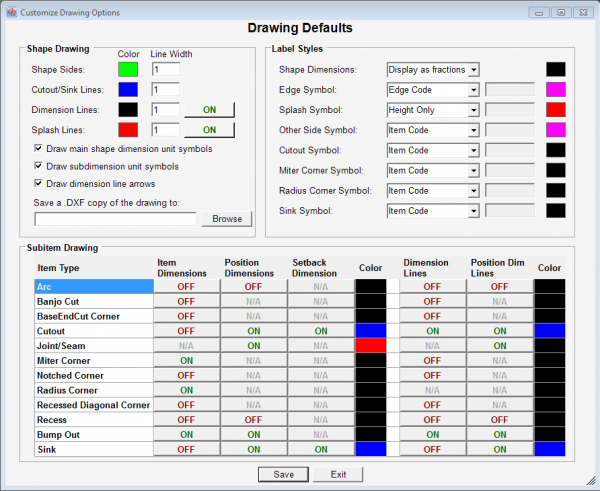
The drawing defaults determine which dimensions, labels, and even colors will be used when producing the countertop layouts. You can find them by selecting the “Edit Drawing Defaults” option in the Utilities menu.
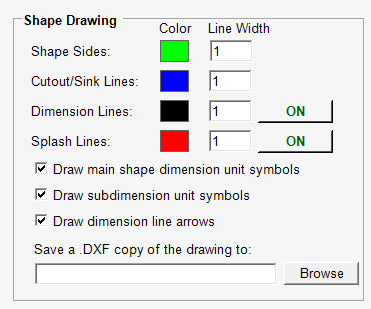
The upper left section controls the overall look and feel of the shapes. You choose which line color will apply to the border of the shape, which one to use for any sink cutouts, one for the dimension lines, and one for the double line used to indicate a splash. You can also set whether or not dimensions will include a unit symbol, like ” or cm, and if dimension lines will include arrows.
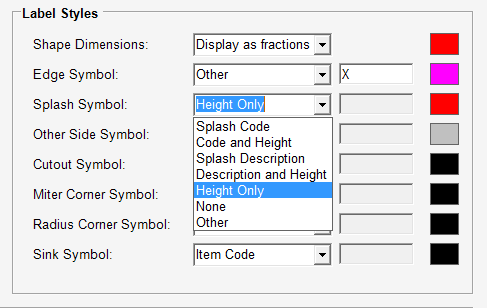
The upper right section controls the labels that get drawn, starting with whether dimensions are displayed in fractions or decimals and what color the text will be. The rest of the options determine what, if any, labels will be applied for sides with an edge profile, splash, or other selection, as well as labels for cutouts, sinks, radiuses, and miters. Each of them has a separate selection for the color of the text too.
The bottom section controls how much detail will be involved in dimensioning your shapes. This way you can turn on dimensions for things like the size of a cutout, or the position of a bumpout, which are normally left off. “Item Dimensions” refers to the ones that indicate the size of a given item, such as the height and width of a cutout. “Position Dimensions” refers to the ones that indicate where on the shape this item goes, like the center line of a sink or the dimension of the lines on either side of a bumpout.
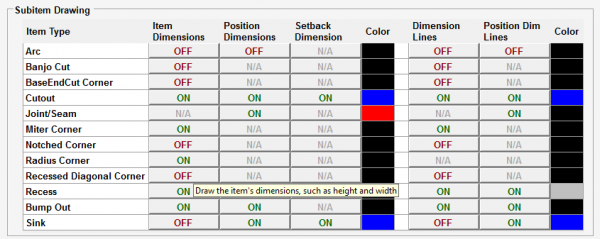
If a field says “N/A”, it means there is no applicable dimension of that type for that particular item.
You can also determine if these dimensions will have dimension lines, and of course what color the dimension labels will be.
These settings take effect immediately, so if you want to draw one shape one way and another shape another way, just change the defaults in between drawings. Just remember that if you re-draw the first shape, the new settings will take effect on it if you don’t set them back beforehand.
If you still need to tweak how your final drawing looks, don’t forget there’s always the built-in CAD tools to break apart shapes, move, edit, and delete labels, and add custom lines and text. For more on that, check out our advanced drawing tutorial.
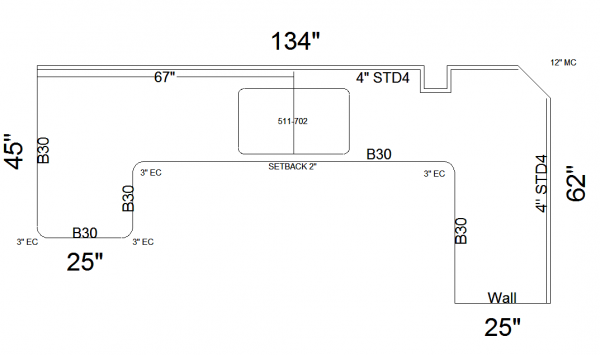
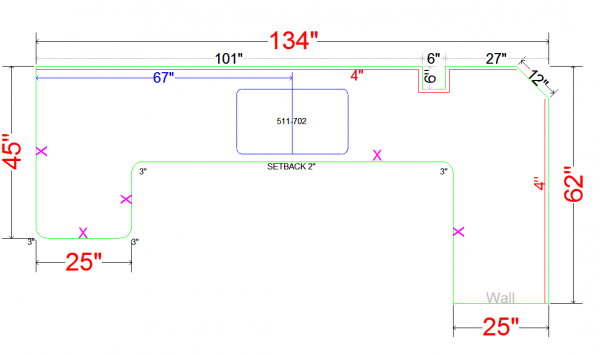
So that’s how you customize your countertop drawings to look how you want them to look. Tune in next week for another edition of Tips & Tricks!

Leave A Comment